Friday, June 21, 2013

Leftover Stock :D

After sharing my artist alley adventure, I've been thinking about what to do with my unsold wares. A few of you kindly people mentioned etsy shops, but seeing as I could just barely figure out the tax situation on a weekend craft show...the prospect frightens me. Haha.

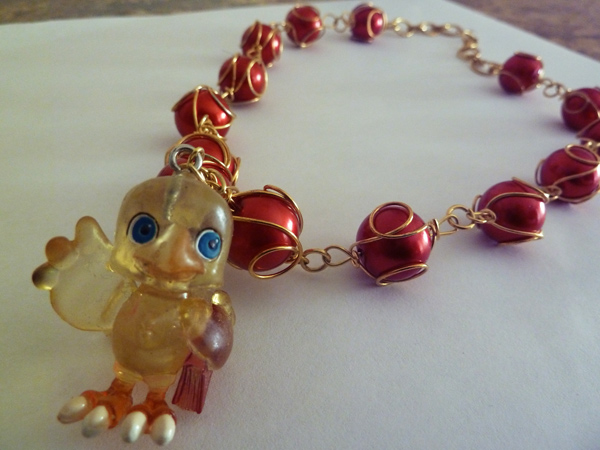
So I think I've figured something out? If you'd like anything, send me an email and let me know, and I'll mail it to you at no cost.  The catch? Whatever the price would have been, if you could please donate it to a charity of your choice.

Honor system! This way I don't have to worry about taxes and paperwork, you don't have to worry about paying some strange person without a valid internet shop, and some lucky charity will get a little love. Not to mention you'll get some cute goods and I'll feel validated that they've been given good homes. Win-win, I'd like to think!

Anyway, here's what I have:

Greeting card + envelope.  Designs are:
a) Kyubey from madoka (or just a cute and creepy face)
b) homestuck symbols (or rather, constellation signs)
c) black forest cake (from Portal, or just a regular birthday cake if you like!)
d) paopu fruit from Kingdom Hearts
e) heart card from zelda skyward sword (though if you were around for Valentine's day you probably already have one! Want another?!)

Drawstring Bags. Each bag is roughly 7"x7", made with cotton print fabric and all have a white cotton lining.  Each bag is shown below with front and backsides.  Print will vary slightly depending on bag, but for the most part the designs are very similar.

1) Kokeshi dolls

2) Onigiri (riceballs) enjoying life

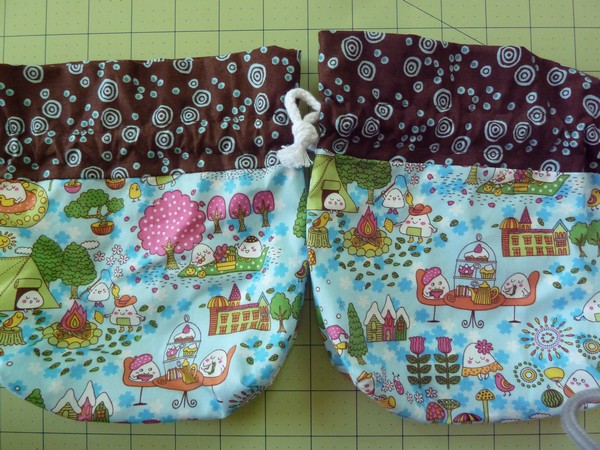
3)  Japan life. (Isn't Mt. Fuji the cutest?!)

4) Graffiti-surfing kids.

5) Kimono girls. (Love the little karate monkey~)

I'm not going to bother listing buttons since there's just so many of them, but if you request a bag I'll probably throw a few in just because.  :)  Also, if this works out I'll ask Friend E if he'd like to do the same with his bookmarks!

Suggested* donation amount to charity of your choice:
$2/card
$5/bag

*Since this is honor system it's really all up to you!

So that's that! First come first serve, I'll let you know if I run out of a particular design. I have maybe 3-4 of each bag or so?

My email is pengawenga [at] gmail [dot] com.  Thank you for shopping!

Wednesday, June 19, 2013

San Mateo County Fair 2013

I was really looking forward to the county fair this year - last year we got to see Boyz II Men, and this year they had another good lineup: headliners including the Whispers, Three Dog Night, and Starship.  We were going to buy a week pass for $17 so we could see it all, but then Sak got called away on business. Boo.

The one day he didn't have to work late was Thursday, which just so happened to be the day Starship (of "We Built This City" fame) was playing. Eighties music, YAY.
They sounded really good; it was a great concert.  Between Sak and I we knew maybe half the songs, and concerts are always more fun when you already know the songs :)

In addition to the concert, we enjoyed the usual fun fair things, like animals and floral arrangements and the random oddities sold in the vendor booths.


Abstract grass art? And a lounging panda, so cute!
SO. CUTE.  Bilbo's lil hobbity house. with real growing plants! Love!
I don't know what these flowers are but they were pretty!
So random. This booth sold scissors. Like, every type of scissors you could ever imagine. Just scissors. @_@
One of my favorite exhibits is always the recyclable craft section, so clever!
Corset made from shoelaces

Outdoor mat from an old garden hose, and a bag made from a Tsingtao calendar.
I think it was last year we saw the caprisun bag?  This year there was a caprisun vest!
The only thing I didn't do this year was pig out on fair food! No fried artichokes or funnel cake this time, because we actually ate a proper dinner beforehand and weren't hungry :P  It's a weird mix of  relief and disappointment. Haha!

Who's playing at your county fair this year?

Tuesday, June 18, 2013

DIY Spiral Lanyard Ribbon Lei

For this year's graduation season, I wanted to try out a new ribbon lei type - the lanyard lei. Like most of the leis I've tried, this was also inspired by a lei from Sak's mom.

Now, I thought this would be easy, seeing as I've made plastic lanyard keychains every single summer camp as a kid (shoutout to Mt. Hermon!). This lei uses the spiral lanyard method exactly as you would with the plastic lanyard.

The only thing is - ribbon is a little more unwieldy than stiff plastic! And it tangles easily. So this took me like a week to finish :P

To start, unravel two entire spools of ribbon in the two colors you would like. (I used 1/4 inch 50 cent ribbon from Michaels, 10 yards per spool.) Fold each 10 yard ribbon in half, and knot both ribbons together, for a total of 4, 5 yard sections. Two of each color.
Now starting the chain is hard. There's really no easy way to do it, but just try your best! Take two of the same colored ribbon, and make loops in opposite directions.  Try to envision making a box.
Take the yellow ribbons and weave them over and under the blue loops, working in a diagonal direction.

Pull all ribbons to form your first "box".

Makes no sense, does it? Let me try with a diagram? If not, try youtube?

So if we have a box:

I'd fold ribbon 2 over to ribbon 3's position, and ribbon 3 over to ribbon 2's position.
two to three
three to two

Now take ribbon 4 and go over ribbon 2 and under ribbon 3 to get to position 1.

Then take ribbon 1, go over ribbon 3 and under ribbon 2 to get to position 4.


Pull all (loosely) to form the box.
Continue weaving the ribbons in diagonals until you run out of ribbon. It may take a while. Watch TV or something while working :P
But eventually a pattern will start to emerge!
And then you'll run out of ribbon and be finished!

Looks small though yeah?

No worries, because it stretches A TON.

This is a very durable lei as well, it can't be easily torn apart or anything.

The blue and yellow lei was for my uncle, who is now Dr. Uncle after having received his Phd from UC Davis! The red and black one was supposed to be for my San Diego grad cousin..but I didn't finish it in time for the ceremony T_T"  Maybe she will get her doctorate too. Then I'll be ready, haha.

(Want to make other ribbon leis? Check out the DIY Project tab for more!)

Thursday, June 13, 2013

New Windows

For our very first major-home-improvement, we had our windows replaced.  All 19 of them!

The old windows were single-pane, cracked and warped and leaky.
Melted glass
Warped doors that wouldn't shut.
Cracks.
Anyway, we got three quotes, two which my dad facilitated and one that Sak did. I was too scared to meet with any contractors myself!  In the end we went with one that a friend had referred.  The cost was about $8.5k for 19 window retrofits, three of the windows being fairly large sized.

What's a retrofit?  I didn't know either. But apparently they cut the old window out, and insert a new window over the old framing. This method is about half the cost of a full re-framed window, and is pretty much just as good as a completely re-done window.  We chose retrofits since our exterior is stucco, and a new frame would have involved cutting and re-patching.  You can never perfectly re-patch stucco!

The drawbacks to retrofits is that you end up losing some window sill space, as well as some glass size since there's a lot of vinyl siding to cover up the old frame.

Old window:

New window (siding not finished yet):
See the gaps where the window fits into the old frame?
They put expanding foam in the cracks!
Kinda creepy looking.
And then the next day they finished with the siding.
Final window:

Bathroom window, some window sill room lost, but enough space for small trinkets still :)

Front window, I chose to have some lines in it for curbside visual interest:

Anyway, I really love the new windows! It makes the house SO MUCH quieter. Can't say I miss the crazy blue jay screeching or never-ending neighborhood construction noises.  I'm not sure how much it effects the heating/cooling of the house since it's been fairly normal weather lately, but we'll see once winter comes!

I also love how easy it is to open and close windows now.  Before it was nearly impossible!

Now, I just need to figure out window treatments. Two years later and I still don't know what to do with them. >.>"

Tuesday, June 11, 2013

White Mage Casual Cosplay

Almost done with these Fanime posts, promise ;)

For our second, much more casual cosplay, we dressed as white mages.

(source)
Easy, yeah? Just white clothes and red triangles!

I used this tutorial to turn a t-shirt into a bolero.
Simply cut the shirt open down the front, cut off the collar and sew the edges into a tube. Insert a ribbon and pull!
Neat, eh? Great for hiding the arm flab~

For triangles I took some red fabric scraps, used fray check on the edges, and fabric glued them to the shirt.
Not the greatest looking. Friend E used iron-on transfers for his and I think it came out better, but from far away you can't really tell.

To accessorize, my kupo felty hair clip (upper left),
and a necklace Sak made from two strands of beads (from Joanns) and a chocobo keychain I had.
That's it! Super simple, a perfect last-minute casual cosplay.  And there were a ton of other white mages at the con, so I'm guessing a lot of people had the same idea!