Thursday, May 31, 2012

DIY Soda Tab Lei

The lei strikes again! This time - made with soda tabs!
Penga-Mom handed over a gallon sized milk container full of soda tabs she'd collected over the last bajillion years. Off to work we go! You'll need about 140 soda tabs and six feet each of two ribbons.

First, the soda tabs had a sharp edge where they were torn off from the can.  It was too hard for us to cut them off, so instead Sak bent it back flat.

First, place some tape sticky side up.
Place a row of tabs, all facing the same way, on the sticky tape, leaving the top holes off the tape.
Add a second row of tabs (wrong sides facing each other) in an offset "bricklaying" pattern.
Then lay another piece of tap on top, sticky side down.
Now, weave one of your ribbons through the holes. Tweezers might help. Pull it most of the way through so that the long end is on the right and about 6 inches remain on the left.


Now cover the top row with another piece of tape.
Carefully remove the bottom row tape, and weave your second ribbon through the loops the same way as the top was done. Remember to pull most of the ribbon through so that the long end is on the right, and about 6 inches remain on the left.


Now, remove all the tape and knot the left end of your ribbon!
A successful start!

To continue the chain, first line up another tab. Pull both ribbons down through the holes created by the overlapped tabs.


Now flip the entire shebang over on it's back and do the same thing - line up a tab and pull the ribbons down through the overlap!

Continue on and on and on until you have a nice sized lei!
This one uses 120 tabs, a wee bit short. The next one will be longer!

Fun! Save all your soda tabs!  You could make a funky bracelet or garland or bandoleer or something with this weave even if you don't want a lei. I'm glad my mom had all the tabs though - we don't definitely don't drink enough soda on our own :P

Have you done any soda tab crafts? I remember painting them with nail polish and making bookmarks from them in junior high!

(Want to make other ribbon leis? Check out the DIY Project tab for more!)

Wednesday, May 30, 2012

Fanime 2012

So Sak and I are still recovering from our 8th date-aversary at Fanime Con! I kept thinking that I'm getting too old for conventions, being as I've been going to this one for over a decade, but a few days prior I came down with a huge case of jumpies and random grinning - I was so excited. So I guess I'm not too old :)
2012 badges and room key!
If we remove one huge glaring factor, I'd say that it was a very enjoyable, nothing-to-complain about convention.  The one large looming shadow, however, would be that lines were insane this year.  We thought we'd get a head-start on things by picking up our pre-reg badges on Thursday, which ended up being a six hour line due to a power outage and lack of staff/computers to handle the huge crowd.
Very, very small section of line that went straight out the convention hall.
People do weird things when trapped in a line. Some get angry. Others make friends. Some play saxophone. Others eat beans out of a can. Well, we're practically camping, eh?
beans behind a grumpy Sak.
A brilliant man even thought to bring his own rolling chair and a book.

Sak was definitely grumpy, after witnessing a number of people cutting in line.  That's got to be a top-ten pet peeve for the both of us. :P

However, we persevered, and got to laugh at our friends arriving the next day as they stood in a four hour line. And the next day as other friends stood in a two hour line.  At least it trended faster as the weekend progressed.

But "line-con" aside, we had a great time. We stayed in the Fairmont hotel, which had amazing downtown San Jose views.
And alien probe looking lights built into the headboard.
Cosplay was rampant.
Code Geass and Adventure Time
Korra and Grell
Optimus and Domo
Chell and a turret(?)
Just some psyducks in line ;)
On Friday we went to one of my favorite events, the swap meet!
It was in a new ballroom this year, which was a little crampy, but I still came away with a ton of goodies. 23 manga books for $45, that's less than $2 a volume. And they retail for $10 plus tax each. Plus my $1 Dalek bookmark I got from the artist alley! Sak bought Beatmania 8th style for $15, but I have no idea if that's a good deal or not because Beatmania games give me a headache. :P
On Saturday we got to pull our our casual Power Ranger cosplay.
Last minute, Friend E decided he wanted sleeves, so he ditched the original tanks we had bought. It came out pretty well, though was probably tooo casual, as no one asked us for a picture.
Super chill casual.
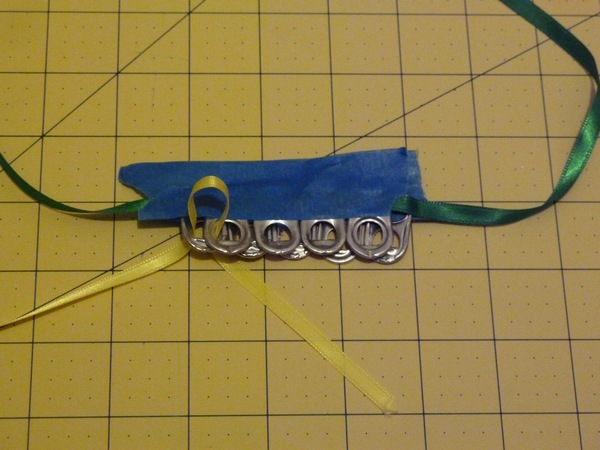
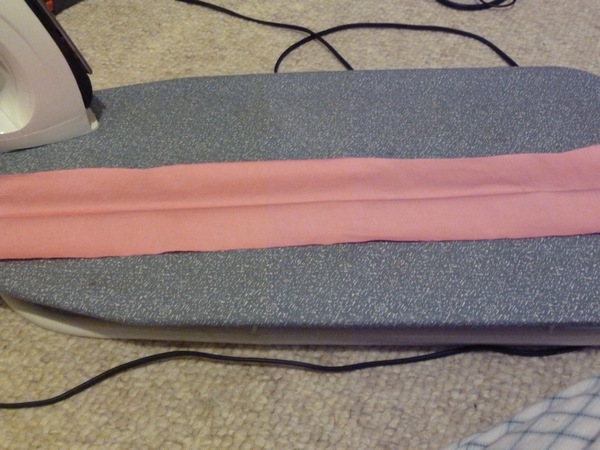
Friend pink ranger had her crochet poke balls to sell, so fun!
By the way, I thought it was completely funny and good-spirited that most the local businesses had signs on their windows, welcoming Fanime to San Jose.  Walgreen's was most strange though, what's with the random clip art dog? Hehe.
Sunday we pulled out casual cosplay #2, poke balls! Recognizable and simple.  Just run away when an Ash cosplayer starts yelling at you, "How'd you guys get off my belt?!" Hehe.
Penga-Sis also came up on Sunday, it was her first time attending the con for reals. (In the past she'd just show up on Monday to go shopping in the dealer hall).  I still think she's too young, but we tried a one day trial. Hope the con didn't taint her innocent soul too much, lol.
Masquerade Cosplay filling up - OMG loved the Yugioh one. 
Anyway, we watched: AMVs (this one was my favorite, Dragonball nostalgiaaa), a Lupin III movie, abridged Dragonball and Avatar (hilarious, youtube it), among other random anime eps and internet channel comedy shows. Lines for panels were too long for me to handle, so we only went to the Bento box making one. I think this is the first year I didn't watch any of the Asian live action films though. Weird. We also didn't spend much time in the game room, but that's okay. I got to see some of my friends I only see once a year here, and that is always the best part :)

Can't wait til next year already...*sigh*

Thursday, May 24, 2012

DIY Tote Bag

Since I had a lot of my Power Ranger sheet left, I wanted to make something for our friend pink ranger.  I wasn't sure how she'd feel about a skirt, but a tote bag? Tote bags are always practical.

I found a tutorial for a nice big tote here (though note that the measurement for the handles is 24" each, not the 14" listed).
Pink Ranger friend makes custom amigurumi pokemon and pokeballs, and sells them at the Fanime convention.  I'm hoping she'll be able to fit some of her yarn in this bag - that's why I needed a big pattern!

How to make straps out of thin, flimsy cotton fabric? Crease it in half..
Fold both sides in so they touch the middle and crease again..
Then fold the whole thing in half lengthwise and crease once more!
Sew up both sides, and you've got a nice, sturdy strap!

Sandwich pocket lining, interfacing, and outer layer together. Using bias tape for the pocket piece, sew one side down..
Then flip it over and sew the other side down.
Except..I screwed up and pulled the bias tape too much so the line shows through :( Homemade look is charmy, right?
I didn't redo it because the structural integrity of the bag is fine, and I'm on a tight deadline. The con starts tomorrow!!

Sew the pocket to another sandwich of outer layer and interfacing. A line down the middle will create a pocket division.
Interfacing and outer layer
Once the front panel is done, sandwich that (right sides facing) with the back outer panel and interfacing, and sew around bottom and sides. Sew the corners down to create a boxy shape on the bottom.
Trim the excess from the corners, and repeat with the two pieces of lining fabric, only leaving a little hole on the bottom so you can turn it inside out later.

Turn the main bag inside out, and sandwich it inside the lining. Pin your straps to the main bag. Right sides should face each other.  Sew around the top.
For whatever reason I stopped taking pictures at this point - but if you want to make this bag you'll go to the original site linked above, I'm sure. :) Basically after you sew up the top, pull the lining out and sew up the little hole.  Push it inside the bag, add some pretty top-stitching, and you're done.  It really is an awesome bag!
It's a good size, and very sturdy! I like that the pocket let me use two different sections of the fabric.
Back side
Spacious!
Red Ranger is sneaking around in the pocket, huhuhuhu!
Anyway, as fun as a skirt is, I think (hope?) that a bag would get more use.
I'm loving the tote pattern though, I will probably make a few more of them for other gifts (Baby showers? Wedding showers? Just because?) down the road. Maybe with normal fabric though. Haha!